Showing posts with label tutorial. Show all posts

Friday, April 26, 2013

How To Make a Recycled Sewing Kit and Pin Cushion

A relative gave me a bag of these containers and said "maybe you can do something with them".  The challenge was on.  With a glue gun, fabric, stuffing and trims, you can make a pin cushion sewing kit or just a cute place to keep stuff.  Start by thoroughly cleaning and drying the container.  Remove any labels.  These containers are nice and strong and are completely clear of labels except the top.  If yours has side writing, just cover with fabric and trims.

Cut a square, or circle larger than the top.  Wrap the fabric around a nice big wad of stuffing.  I took a few stitches to hold the corners together.

Hot glue the pouffe to the lid.  I worked my way around, tucking under the raw fabric edge and gluing as I went- probably the hardest part.  Add trims around the rim to cover any glue drips.  I used trim and ribbon scraps I already had.

I have the fringe and lace facing up so it doesn't get in the way of closing the jar and
it is cute like this.  They remind me of flowers and cupcakes.


Makes a great sewing kit or place to keep jewelry. 
You could place fancy broaches and earrings in the pin cushion too.
Happy Feline Friday!

Wednesday, February 13, 2013

Collar Necklace Tutorial

Last night on Pretty Little Liars, Ashley Benson (who plays Hanna), was wearing the cutest collar necklace.  I was inspired to make my own!  On our TV it looked like pearls on black, although after looking online just now, it looks more like yellow on metal mesh. 
Here's my how to:
Place a towel, piece of paper and crew neck t-shirt on a table.  Use a pin to poke holes through the paper, in the shape of the neck.

If you look closely, you can see the pin holes.

Use a French Curve to draw a collar shape coming down from the pin marked neckline. 
Fold paper in half (so both sides will match) and trace the shape.  If you don't have a light box (I don't), just hold it on the window glass (in daylight) and trace.

I love using supplies I already own.  Here is pre-quilted navy silk velvet and gunmetal gray silk shantung.  Just enough for this project!  Trace the pattern onto the wrong side of the fabric.  Since this fabric can be slippery, I sewed before I cut the piece out.  Stitch only the lower edges 1/4" seam allowance.  Insert the ties (see below) and continue stitching
but be sure to leave an opening for turning.

You could use ribbon, but I used some silk shantung bias strips (2" folded in half).

Clip curves, turn right side out.  Hand stitch the opening shut, tucking in the raw edges.

I attached pearl beads.

Cute!


I think this old t-shirt could make a neat collar too, with a completely different look.

Tuesday, June 12, 2012

How To: Insulin Pump Cover and Receiver Pocket

Here is how I made a receiver pouch and an insulin pump cover.  Before starting, you should check the dimensions of your particular items.  The receiver pouch mounts on a belt and could easily hold a camera or cell phone instead.  The pump cover is similar to a shower cap in that it has elastic and slips over the front.  You could use pre-quilted fabric.  I free motion quilted 2 layers of flannel together (with batting in between). 

First, the receiver pouch:
Cut a piece of fabric 12"x6", slightly rounding one end.  Bind or finish the edges.  Cut unquilted fabric 8"x2 1/2" for the belt loop.  Sew the short sides together, 1/4" seam allowance.

Press flat with the seam in the middle.

Sew the belt loop to the pouch as shown, turning under raw edges. 
Loop is 5 1/4" from the straight, bound edge.

Right sides together, fold up and sew, the straight edged end, 1/4" seam allowance.

Sew across the corners, as shown.  Turn under and top stitch the sides down.
Top stitch the sides down and add Velcro.

Finished front view.

Back view of the belt loop.

Now for the Insulin Pump Cover.
I used the same quilted fabric as before.  Cut a piece 5"x6 1/2".   Then cut each corner off, creating four 1 1/4"x1 1/4" squares.  In one corner, cut an additional notch out for the hose. 
* Make sure you cut the notch in the correct area for your hose!


Sew the 3 similar corners together, right sides together 1/4".  The notched corner will need finishing- I used a serger, you could bind or zigzag instead.

Sew on 7" of 1/4" elastic, extending into the notched area.

Sew on Velcro.

Here is the back finished view.

Here is the front finished view.

Your sizes might vary according to your needs.
Happy Sewing!


Wednesday, May 16, 2012

How to Hem Pants with a Rolled Hem

Creating a simple rolled, top stitched hem is really easy to do!
Here are a pair of pants needing to be shortened.  Decide how wide of a hem you want (here I'm doing a 1/2" hem.)  For a 1/2" hem, double it because you will be turning it over twice.  So I will need 1" hem allowance.  Mark the new hem and then add the 1" hem allowance.  Cut off the remaining fabric.  Press up 1", then fold down 1/2" and press.  The raw edge should now be enclosed.
Stitch close to the fold.  All done!  See the finished hem below.  (Below left shows outside of hem, right shows inside of hem).


Wednesday, March 28, 2012

How to Sew on Patches- Girl and Boy Scout

I am often asked by non-sewing people, how to sew on a patch.  I sew on iron-on patches too, because I am suspisious that way.  I generally match the top and bottom thread to the patch background color.  I use a long machine stitch if I might need to remove the patches later. 
The 759 were originally on his blue cub uniform.  They  
were sewn on using a rectangle (see back, below). 

The patches below were tricky because they are on a pocket.  I hand sewed those in a matching thread.  I insert a plastic ruler in the pocket so I don't accidently sew the pocket shut.


Wednesday, March 7, 2012

Make Yourself a Lucky Charm

St.Patrick's Day is coming soon!  Here is how I make my lucky paperweight.
You can make yours any size.  The smallest above (and the example below) is using a piece of fabric 7"x4".  If you want to add any fancy machine stitches, do that now.  Start by folding it in half as shown, with right sides together.  Sew 1/4" seam allowance along 2 sides (see below).

Next, you "box the bottom".  See below.  Fold each corner so seams match or so seam is at the center of the fold.  Stitch across as seen in the picture.  This creates a flat bottom like a paper grocery bag or a box.  Turn it right side out.

Here is what it should look like from the outside.

Fill the bag with clean rocks and lucky doodads.  Top it off with polyfil stuffing or fabric scraps.  Run a long hand stitch around the top to gather in the fabric and close up the top.  At this time add any ribbons and yarn for hair.

I used felt eyebrows that I hand stitched on at the same time as I attached the vintage buttons for eyes.  Now just sit back and let the good luck grow!

Wednesday, January 25, 2012

Happy Chinese New Year!

Here is a tutorial for fabric fortune cookies!  Great for new years and also for Valentine's Day.  I will be sewing some later today for sure.  Actually it is also my birthday today so I always feel like this is my personal new year starting.  I refuse to do any chores today!

Here are some small quilted bags I did a day or two ago.  Slightly larger than
these in this tutorial. 

Friday, December 30, 2011

The Handy Pocket

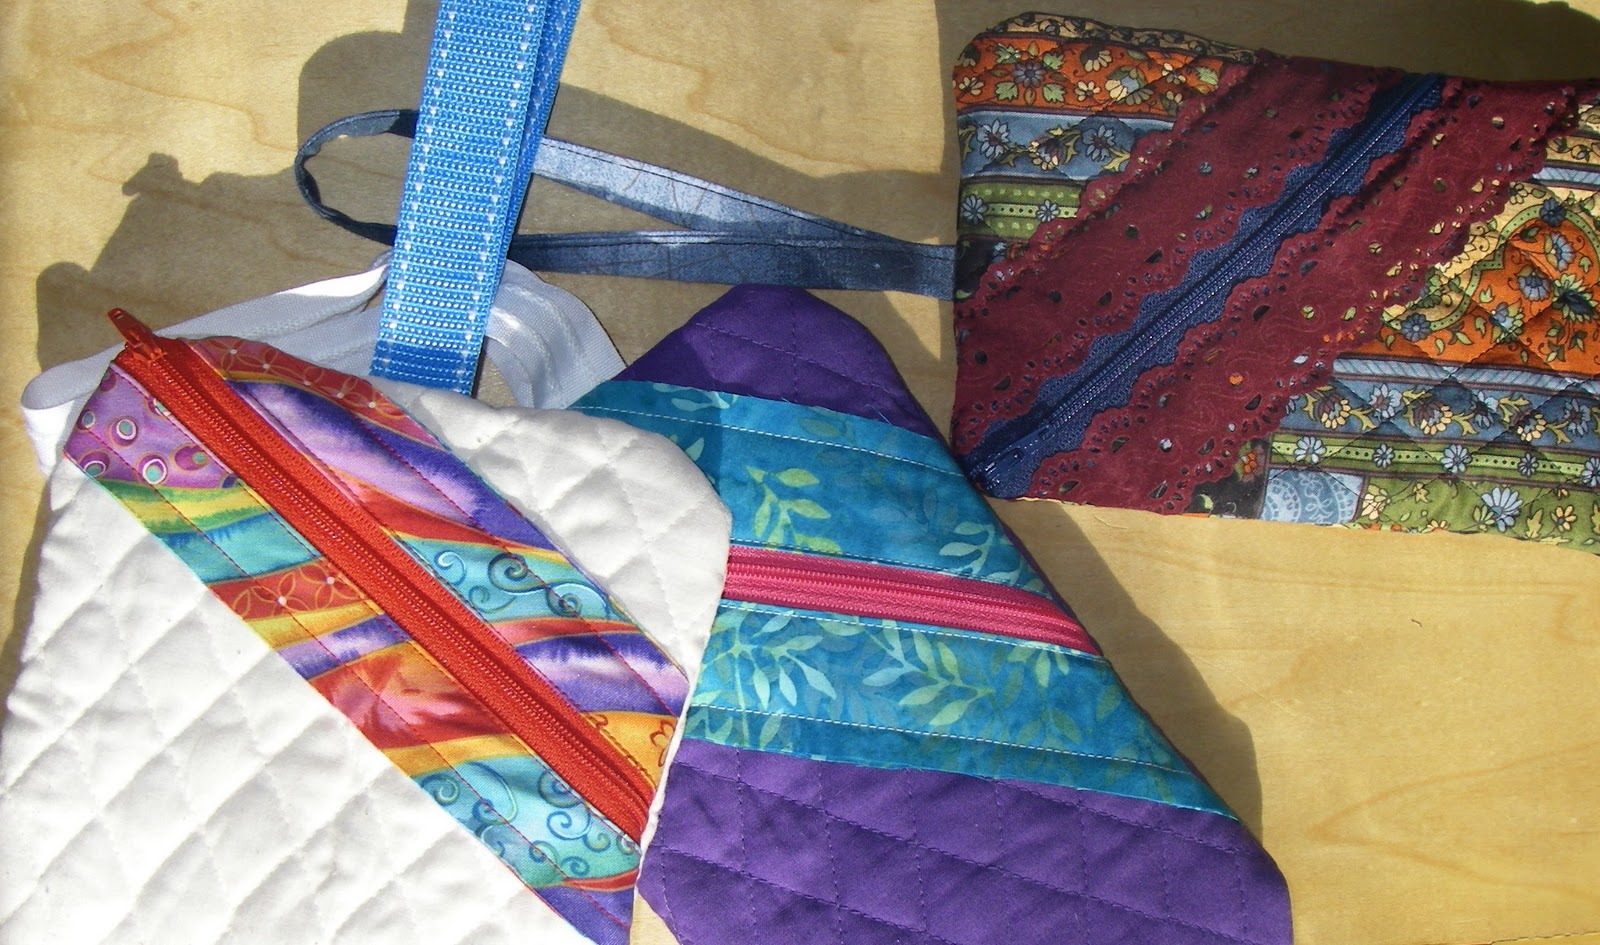
Great as a gift- can be any size to fit keys or a phone etc.  I make them in two finished sizes 7"x4" and 5"x3".  To make one: cut 2 pieces of pre-quilted fabric (include seam allowance).  Stitch a zipper on, using a zipper foot.  At the same time, stitch on trim.  There will be fabric behind the zipper. Cut out behind the zipper.  Add a small hanging loop (see above left).  The photos above show the front and back of the same piece.


Place the back and zipper piece, right sides together.  Unzip the zipper.  Stitch around the outside edges.  Clip corners and turn right side out.

Add a colorful carabiner so you can hook it to your beltloop, backpack, purse strap etc.

Sunday, December 11, 2011

Nifty Teenie Kleenie Holder

This makes a great small gift, easy to sew too!  Start with 3 pieces of fabric 6 1/4"x 4 1/4" and 2 pieces 4 1/4"x4 1/4".  Press 4 of the pieces in half (wrong sides together) as shown above.

 Layer the pieces kind of like how you might reclose a cardboard box, with all the flaps overlapping.  The striped fabric shows this.  All of the folds should point towards the middle and the raw edges should be even with the unfolded rectangle.  Right sides together.  Sew completely around the edges.

 If you like, you can use a 3"x5" piece of paper to stitch around. 

 Trim the excess off.  Then pinch the corners and stitch across as shown below.  This should create a box corner.
 Box corners as seen from the underside.  Turn right side out and slip in a tiny package of tissues.


Here are some finished holders!